 Save Pin
 The first time I made coffee jelly was during a sweltering July heatwave when even the thought of hot coffee made me break into a sweat. I'd stumbled across the recipe in a Japanese cookbook and was intrigued by the elegant simplicity. The kitchen filled with the rich aroma of freshly brewed coffee as I watched the dark liquid transform into a wobbly, translucent dessert that caught the afternoon light through my window.
Last summer, I served coffee jelly at an impromptu gathering after my friend Mei mentioned missing desserts from her childhood in Japan. The look on her face when I brought out those glistening cubes topped with cream was worth every minute of preparation. Everyone went quiet for a moment as they took their first bites, then the table erupted with questions about how something so simple could taste so sophisticated.
Ingredients
- Strong Coffee: The backbone of this dessert, I've learned that freshly brewed coffee makes all the difference rather than instant, giving deeper flavor notes that bloom as you eat.
- Unflavored Gelatin: The magical transformer that turns liquid into those perfect wobbly cubes, I always bloom it properly to avoid any grainy texture.
- Heavy Cream: Creates that luxurious counterpoint to the coffee, and I've discovered that chilling the cream thoroughly before whipping makes it pour like silk.
- Granulated Sugar: Balances the coffee's bitterness, though I sometimes adjust the amount depending on how strong my brew is that day.
Tired of Takeout? 🥡
Get 10 meals you can make faster than delivery arrives. Seriously.
One email. No spam. Unsubscribe anytime.
Instructions
- Bloom the Gelatin:
- Sprinkle gelatin over cold water in a small bowl and let it stand for about 5 minutes until it looks wrinkled and absorbs the liquid completely.
- Prepare the Coffee Base:
- While the gelatin works its magic, combine that steaming hot coffee with sugar in a medium bowl, stirring until every granule disappears into the dark liquid.
- Melt and Mix:
- Warm the bloomed gelatin until it becomes clear either with a quick zap in the microwave or over gentle heat. Stir this liquid gelatin into your sweetened coffee, making sure its completely incorporated.
- Set the Stage:
- Pour the mixture into a shallow dish and let it cool to room temperature before sliding it into the refrigerator. You'll need at least two hours of patience as it transforms into a wobbly solid.
- Cube Creation:
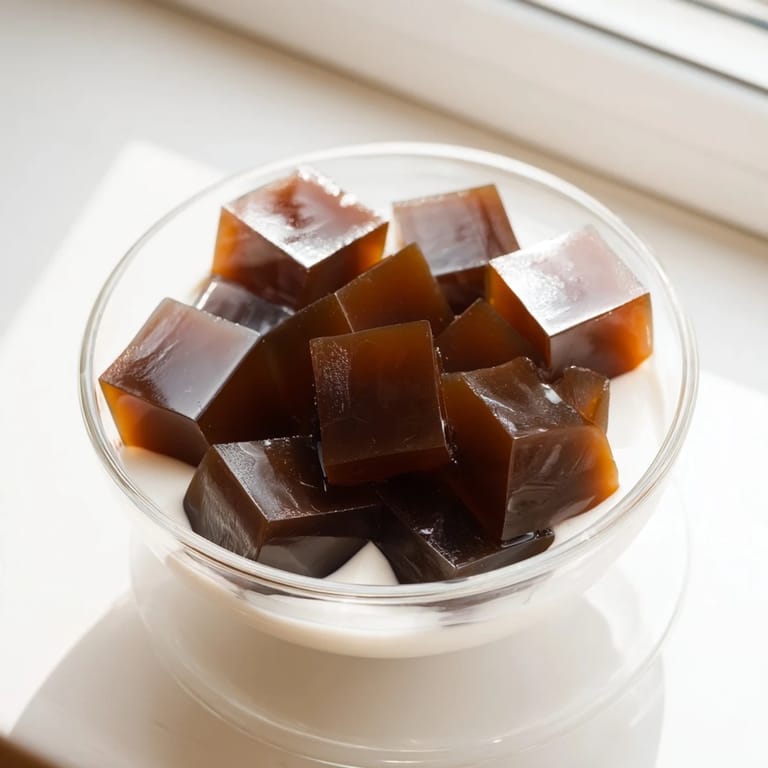
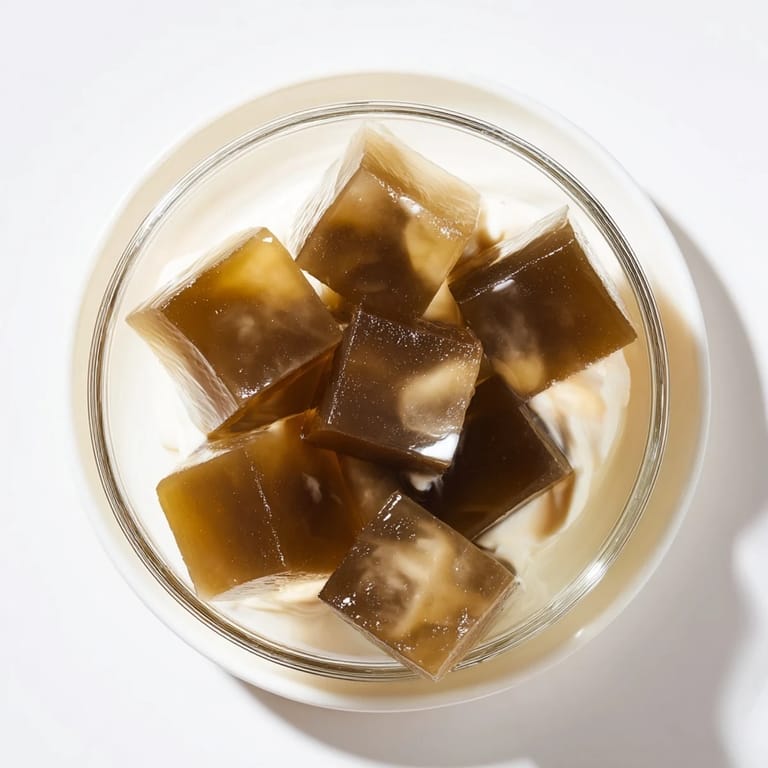
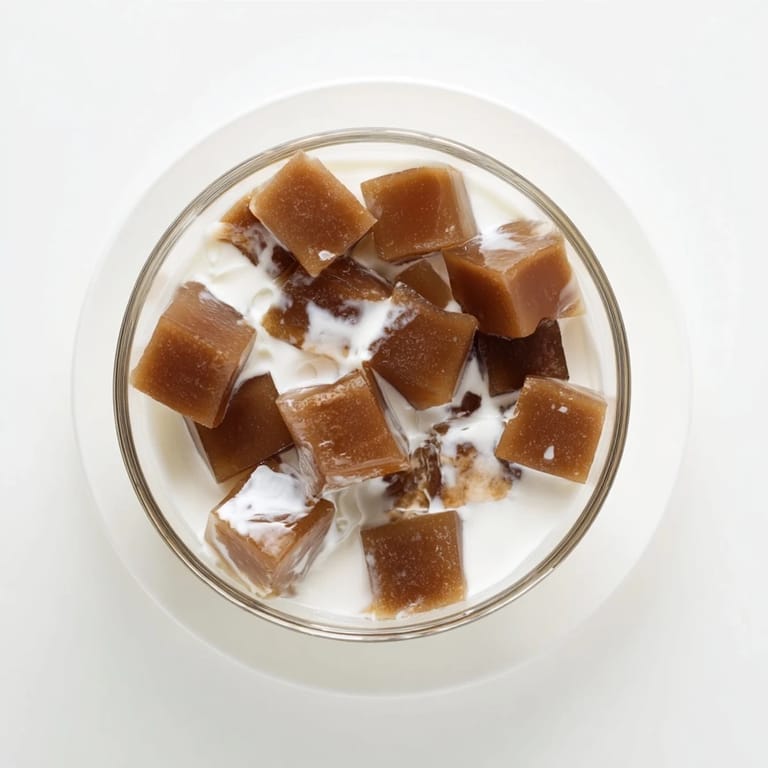
- Once firm, run your knife through to create those satisfying little cubes that capture light like coffee-colored gems. I find that a sharp, straight-down cut works best for clean edges.
- Whip the Cream:
- In a separate bowl, whisk together heavy cream with sugar and vanilla until it reaches a pourable but slightly thickened consistency. You want it fluid enough to seep between the jelly cubes.
- Assembly Time:
- Divide your jelly cubes among serving glasses then pour that sweet cream over them like a gentle rain. The contrast of dark cubes against white cream never fails to look impressive.
 Save Pin
 I'll never forget serving coffee jelly at my sister's baby shower where several guests were avoiding alcohol and caffeine. I made a decaf version alongside the regular, and watching everyone gather around the dessert table comparing the subtle flavor differences between the two versions turned into the highlight of the afternoon. Something about those wobbly cubes brought out the childlike joy in all of us, despite being such a sophisticated little dessert.
Texture Secrets
Over countless batches, I've discovered that the temperature of your refrigerator significantly impacts the final texture. My old fridge ran extremely cold, producing jelly that was almost too firm, while my current one creates the perfect gentle wobble that collapses with just the right resistance against a spoon. If you find your jelly too firm, try reducing the gelatin by a quarter teaspoon next time.
Make-Ahead Magic
One summer evening when friends dropped by unexpectedly, I was grateful for the coffee jelly waiting in my refrigerator from the day before. The jelly itself can be made up to three days ahead, though I recommend preparing the cream just before serving. Something wonderful happens to the coffee flavor after it rests overnight, becoming more mellow and complex, like a good friendship that deepens with time.
Creative Variations
After making this dessert dozens of times, I've experimented with countless variations that have brought new dimensions to this humble treat. My winter version includes a hint of cardamom and cinnamon in the brew, while summer calls for a splash of orange liqueur that brightens everything with citrus notes.
- For a more dramatic presentation, layer the jelly and cream in tall clear glasses rather than mixing them together.
- Try using different coffee beans each time you make this, noticing how Ethiopian beans create floral notes while Indonesian varieties add earthiness.
- For special occasions, add a tablespoon of coffee liqueur to both the jelly and the cream for an extra indulgent adult version.
 Save Pin
 Coffee jelly reminds me that sometimes the simplest pleasures are the most profound. Every time I make it, I'm reminded that transformation is possible with just a few ingredients and a little patience.
Recipe FAQs
- → What type of coffee works best for this dessert?
Freshly brewed strong coffee delivers the best flavor. For a more intense taste, use espresso or double-strength brew. Adjust the coffee strength to match your preference, as this affects the final dessert's depth.
- → Can I make this ahead of time?
Yes, coffee jelly can be prepared up to 2 days in advance. Store in the refrigerator in an airtight container. Prepare the sweetened cream shortly before serving for the best texture and taste.
- → How do I achieve the perfect jelly consistency?
Bloom the gelatin properly in cold water before dissolving it fully. Pour into a shallow dish for even setting. The mixture should be completely firm after 2 hours of chilling, producing cubes with the ideal jiggly texture.
- → What are good dairy-free alternatives for the cream?
Coconut cream, whipped oat cream, or soy cream work excellently as substitutes. Whip them with sugar until slightly thickened, just as you would heavy cream. The result maintains the dessert's creamy appeal while accommodating dietary preferences.
- → How should I cut the jelly to get clean cubes?
Use a sharp knife dipped in hot water, wiping between cuts for clean edges. Cut into uniform cubes roughly 1-inch in size. Working with chilled jelly ensures the cubes maintain their shape without breaking apart.
- → Can I add garnishes to enhance presentation?
Absolutely. Dust with cocoa powder, add chocolate shavings, or top with a coffee bean for visual appeal. These garnishes complement the coffee flavor while elevating the dessert's elegant presentation.