 Save Pin
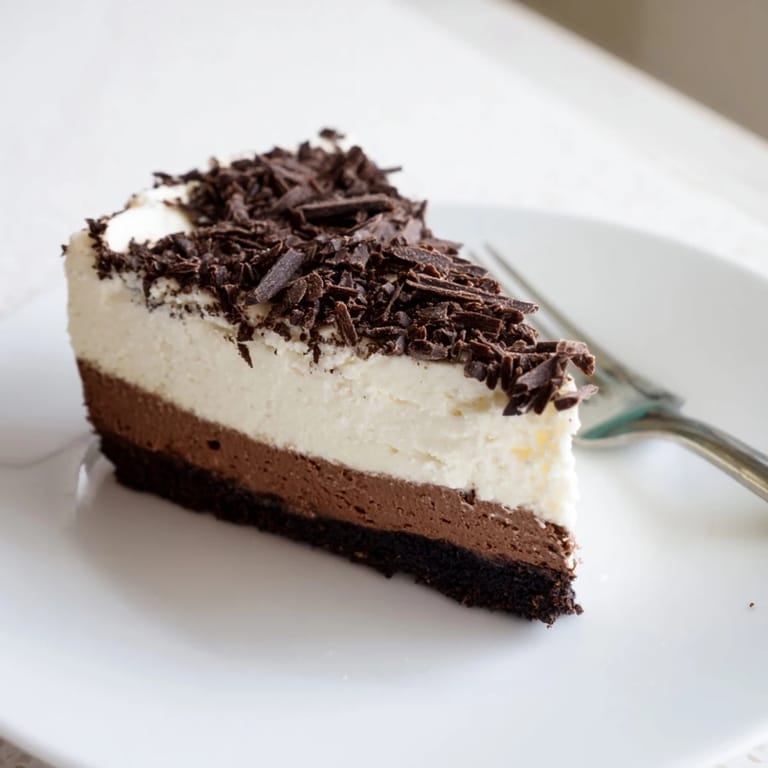
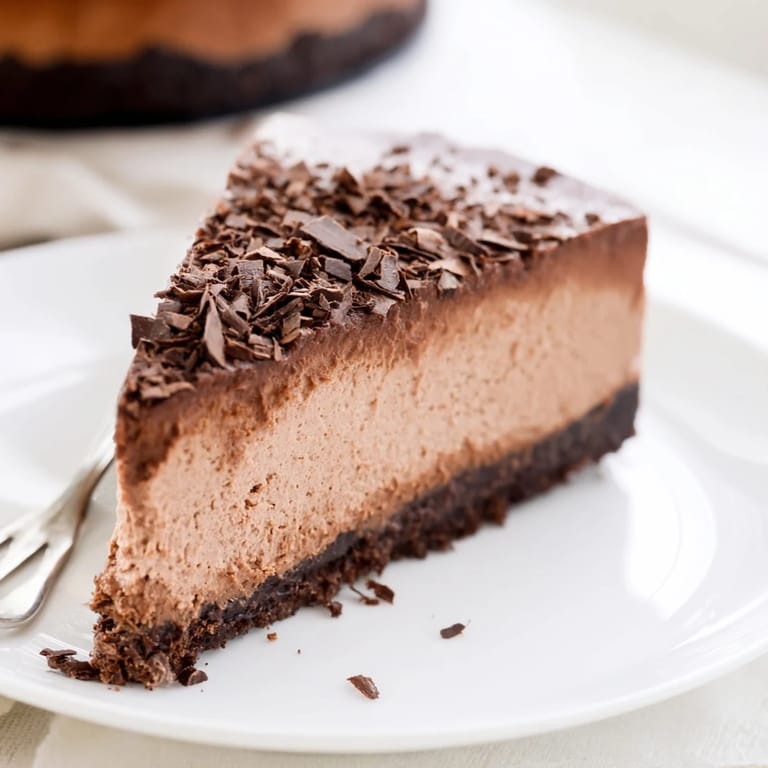
 The afternoon sun hit my kitchen counter just right as I stared at a tub of cottage cheese, wondering if my friends would believe me when I called it dessert. We'd been experimenting with protein-packed sweets, and honestly, most attempts tasted like disappointment in a bowl. But something about blending cottage cheese with chocolate felt like it could work, like maybe I'd discovered the kitchen's best kept secret. That first slice changed everything—silky, rich, and somehow lighter than anything I'd made before.
My sister-in-law took one bite at our Sunday family dinner and immediately asked for the recipe, her eyes widening when I whispered the secret ingredient. Now it's the most requested dessert at every gathering, and watching people's faces when they finally believe it's cottage cheese never gets old. Last week my neighbor actually texted me at midnight just to say she couldn't stop thinking about that slice she'd had hours earlier.
Ingredients
- Graham cracker crumbs: The foundation that holds everything together—press them firmly but gently into your pan
- Coconut oil or melted butter: I prefer coconut oil for that subtle sweetness but both work beautifully to bind the crust
- Cocoa powder: This isnt just for color—it deepens the chocolate flavor throughout the entire cheesecake
- Low-fat cottage cheese: The star that makes everything creamy and dreamy without the heaviness
- Greek yogurt: Adds tang and silkiness while keeping things light
- Eggs: Room temperature eggs blend better and help create that perfect set
- Dark chocolate chips: Melt these slowly and let them cool slightly before adding to the mix
Tired of Takeout? 🥡
Get 10 meals you can make faster than delivery arrives. Seriously.
One email. No spam. Unsubscribe anytime.
Instructions
- Prepare your crust:
- Mix those crumbs with cocoa powder, coconut oil, and maple syrup until everything sticks together when you pinch it. Press it into your springform pan like you mean it, then bake for just 8 minutes to set the foundation.
- Blend until you cant tell it's cottage cheese:
- This step makes or breaks everything—blend that cottage cheese for a full 1 to 2 minutes until absolutely no lumps remain. Add in your yogurt, eggs, sugar, cocoa powder, vanilla, and cornstarch, then blend again until it looks like silk.
- Mix in the melted chocolate:
- Fold in your cooled melted chocolate by hand—over-blending here can make the texture weird, so just gently combine until swirled through.
- Bake with patience:
- Pour everything over that cooled crust and smooth the top like you're tucking it in. Bake for 35 to 40 minutes until the center is just set but still has a little wobble—like a gentle wiggle when you tap the pan.
- The cooling trick:
- Turn off the oven, crack that door open, and let the cheesecake hang out inside for an hour—this slow cooling prevents those ugly cracks we all hate. Then chill it for at least 3 hours until it's completely set and ready to blow some minds.
 Save Pin
 There's something almost magical about slicing into this cheesecake and watching people take that first tentative bite, their eyebrows raising in surprise. My daughter now requests it for every birthday celebration, and honestly, I'm not complaining—it's become the dessert that proves healthy can still be indulgent.
Getting The Texture Right
The difference between good and great here is all about blending time. I've learned that rushing this step leaves tiny grainy bits that remind everyone they're eating cottage cheese, but giving it those extra minutes transforms everything into something that could fool any cheesecake purist.
Making It Your Own
Sometimes I swirl in melted peanut butter or add a splash of coffee to the filling for that mocha twist. The beauty of this base is that it plays nicely with pretty much any flavor addition you can dream up—just keep the ratios similar and you'll be fine.
Serving Suggestions That Wow
A dollop of Greek yogurt mixed with honey on top adds this fresh brightness that cuts through all that chocolate richness. Fresh berries aren't just garnish here—they actually wake up all the flavors and make each slice feel special.
- Let it sit at room temperature for 15 minutes before serving
- Use a hot knife for those clean restaurant-style slices
- Store any leftovers covered—they're even better the next day
 Save Pin
 This cheesecake has taught me that some of the best kitchen discoveries happen when you're brave enough to try something unexpected. Hope it becomes your go-to dessert for both impressing guests and treating yourself on random Tuesday evenings.
Recipe FAQs
- → Why use cottage cheese instead of cream cheese?
Cottage cheese significantly boosts protein content while reducing overall fat. When blended thoroughly, it creates an incredibly smooth texture that's nearly indistinguishable from traditional cheesecake.
- → How do I ensure the cottage cheese blends smoothly?
Blend the cottage cheese on high speed for 1-2 minutes until absolutely no lumps remain. A high-powered food processor works best, but a powerful blender also achieves excellent results.
- → Can I make this gluten-free?
Simply swap the graham cracker crumbs for gluten-free graham crackers or almond flour crumbs. All other ingredients are naturally gluten-free.
- → Why cool the cheesecake in the oven with the door cracked?
This gradual cooling method prevents cracks from forming on the surface. Rapid temperature changes cause cheesecakes to crack, so slow cooling ensures a pristine top.
- → How long does this need to chill before serving?
The cheesecake requires at least 3 hours in the refrigerator to fully set. For the best texture and flavor, chill overnight. It keeps well for up to 5 days when properly stored.
- → Can I freeze this cheesecake?
Yes, freeze individual slices wrapped tightly in plastic and foil for up to 3 months. Thaw in the refrigerator overnight before serving for best results.